
WITH THE P&K LIE TRUING STAND
YOU TRUE FROM THE BEGINING
TO THE CENTER POSITION
Centering up to +/- 0,05 mm !
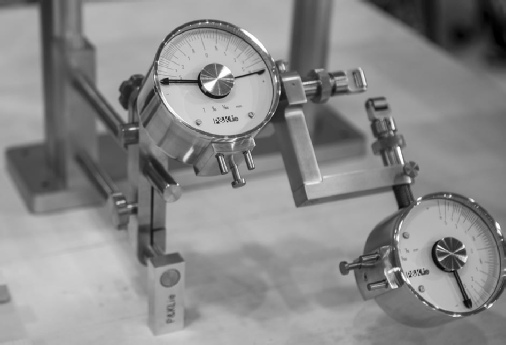
With our truing stand the quick and precise centering is performed by measuring. This method excludes all mistakes through mechanical adjustment and production-tolerances. The unique unit of the P&K Lie truing gauges and the stable truing stand makes it possible to true the rim to the center position. The accuracy of truing up to +/- 0,05 mm from the center location. You get a proved center position of the rim, which remains during changing the wheel. Even inaccuracy at the axle ends can be compensated through measuring the wheel axle in the wheel holder. This is necessary for very precise truing. You don’t need a dishing gauge with this system.
To measure the center position
Turn the fixed wheel until the sensor is at the valve hole. Then turn the knurled nut until the main pointer shows zero. Take out the wheel, turn it around so that you can measure the other side of the rim and tighten it again. Turn the fixed wheel until the sensor is at the valve hole. Now turn the knurled nut until the main pointer shows the half value. Now the measuring gauge is adjusted so that zero is the center location and you can center the rim to zero.
Adjust the radial gauge
On the radial gauge the center is immediately visible between both drag pointers. Turn the wheel slowly until the main pointer from the radial gauge is in the middle of both drag pointers. Turn the knurled nut until the main pointer shows zero. Now the measuring gauge is adjusted so that you can reduce the radial run-outs to zero.
Center position without measuring (only suitable for re-truing)
This method can be used for truing of medium quality. With this method you only adjust the main pointer of the lateral gauge between the drag pointers without measuring. The tolerance from the estimated center location is in the most cases smaller than +/- 0,5 mm.
Other systems:
With mechanical center setting systems there are inaccuracies which multiply from the axle to the rim. The consequence is that you must check with the dishing gauge and correction is necessary. Other systems often don’t give any details about the accuracy of the truing stand.
Therefore, we have developed a truing stand which allows to measure the center quick and reliable.

Copyright © 2010 P&K Lie GmbH • Webdesign by Kerstin Lie
| Truing stand |
| Truing stand colors |
| Truing Gauge |
| Truing gauge Special 250 |
| Requirement |
| Center Position |
| Truing |
| Advantage |
| Why |
| Service |
| Instruction |
| Discbrake Tool |
| Tensionmeter |
| Holder |
| Adaptor |
| BaseBox |
| Germany |
| Austria |
| Denmark |
| UK |
| Ireland |
| Spain |
| Swiss |
| Belgium |
| France |
| Sweden |
| Slovenia |
| Australia |
| Korea |
| News |
| Schoolbook |
| Press |
| P&K Lie |
| Contact |
| Imprint |
| Terms and Conditions |
| Right of Withdrawal |
| Data Privacy |