

SAVE WORK & TIME
GO DIRECTLY
TO THE RIGHT SPOKES
With the P&K Lie truing gauges you work
clear, fast and aimed.
• Precision clockwork for precise work
• Centering up to +/- 0.05 mm
• Truing results at lateral and radial run out up to +/- 0.05 mm
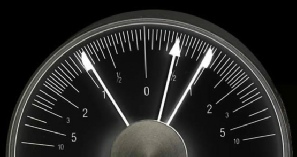
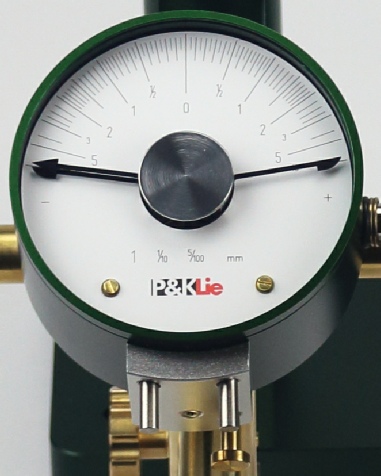
• Mainpointer for present display
• Drag pointer for perfect centering and to show the maximum
run-outs
• No dishing gauge required
• Fine adjustment of the truing gauges
• The direction of rotation for tighten or loose is shown true sided
• The non-linear scales have the whole measuring range clearly on a semicircle
• Large measurement range of 20 mm
• In the center position small movements are shown with a scale graduation of 0,05mm
• Large run outs are shown with smooth pointer movements
• Because of the big measuring range it is possible to put in the wheel once it is laced, also if a spoke is broken, you will immediately have the overwiev
• The gauges are produced at P&K Lie in Germany
• All parts of the gauge are special designed and produced
• With our truing gauges also beginners can learn truing easy
We have developed the 0,05 mm measuring gauge because it’s possible to reach this value. Our measuring gauges have a non-lineare scale for smooth pointer movements with sensitive indication and the measured values are shown true sided. With the non-lineare measuring gauge it’s possible to use drag pointers. The drag pointers are an essential simplification for truing because they show the max run-outs and so it’s possible to minimize the run-outs systematically. With the non-lineare scale and the drag pointers our measuring gauges have ( for wheel truing ) an essential advantage of usual measuring gauges.
A human hair has a diameter about 0.05 mm and to reach this truing result all factors must agree. The truing stand must be stable enough for constant axle position, the gauges should be able to show the value of the rim position understandable and the rim with hub should allow this tolerance.
With the drag pointers you immediately recognize the condition of the wheel.
In this video you can see the difference between
the P&K Lie measuring gauge ( 0,05mm)
and a normal measuring gauge ( 0,01mm)
Copyright © 2010 P&K Lie GmbH • Webdesign by Kerstin Lie

| Truing stand |
| Truing stand colors |
| Truing Gauge |
| Truing gauge Special 250 |
| Requirement |
| Center Position |
| Truing |
| Advantage |
| Why |
| Service |
| Instruction |
| Discbrake Tool |
| Tensionmeter |
| Holder |
| Adaptor |
| BaseBox |
| Germany |
| Austria |
| Denmark |
| UK |
| Ireland |
| Italy |
| Spain |
| Swiss |
| Belgium |
| France |
| Sweden |
| Slovenia |
| Australia |
| Korea |
| News |
| Schoolbook |
| Press |
| P&K Lie |
| Contact |
| Imprint |
| Terms and Conditions |
| Right of Withdrawal |
| Data Privacy |